

Create a virtual network
In this walkthrough, we will create a virtual network, deploy two virtual machines onto that virtual network and then configure them to allow one virtual machine to ping the other within that virtual network.
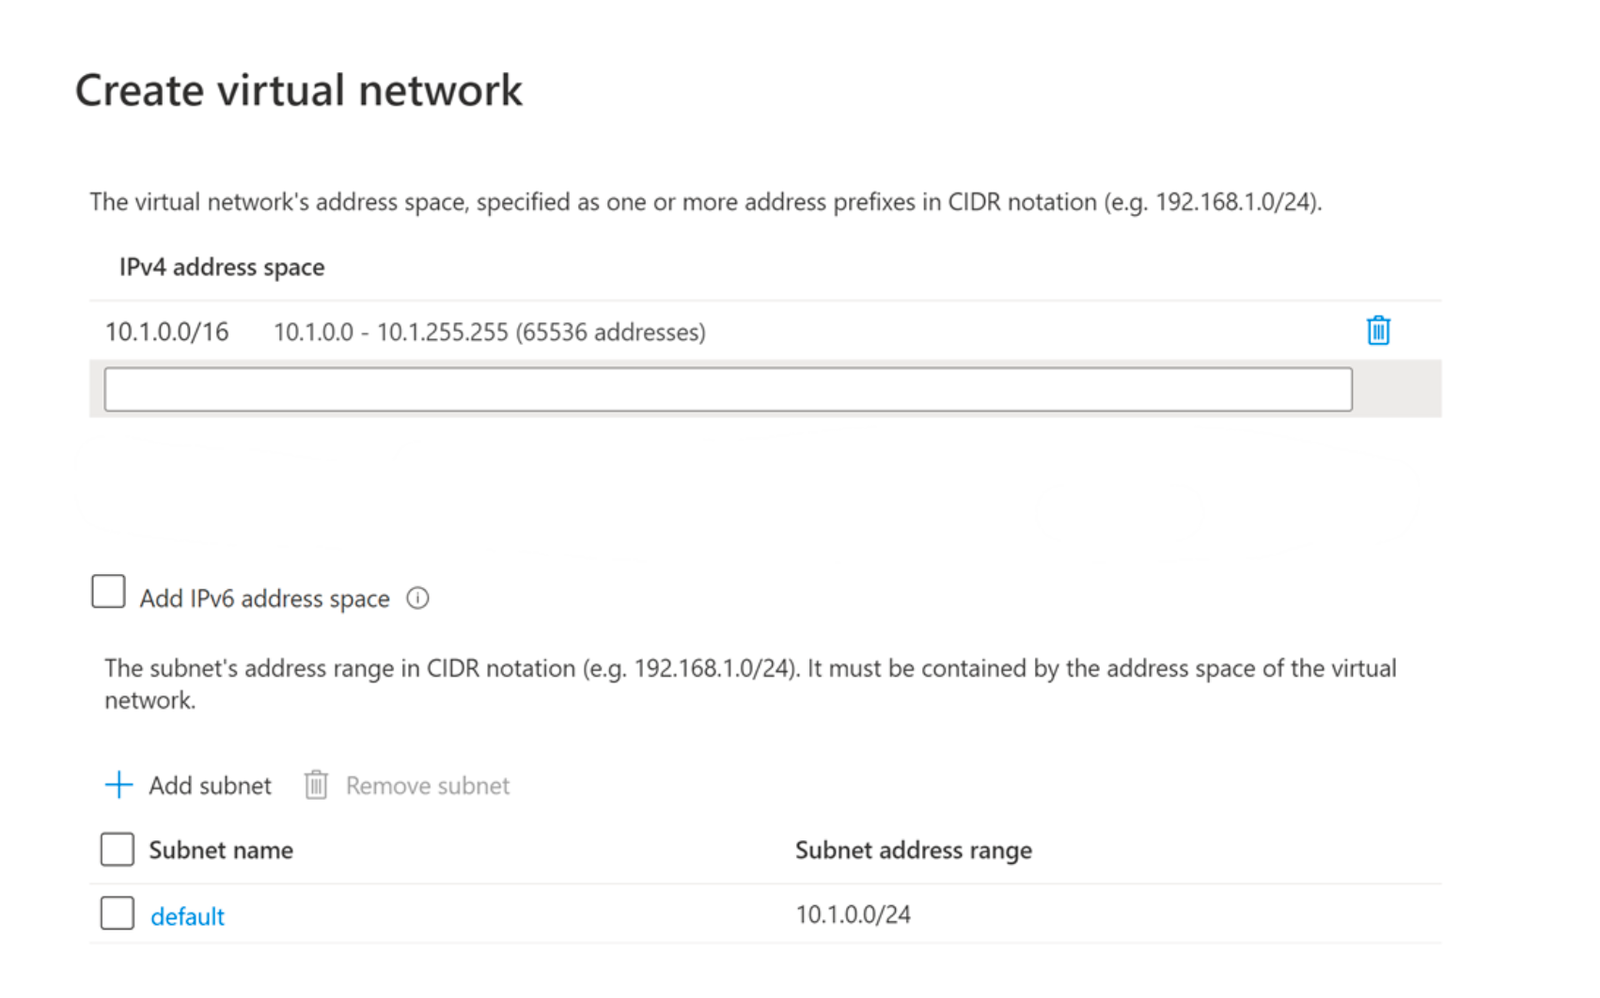
Task 1: Create a virtual network
In this task, we will create a virtual network.
- Sign in to the Azure portal at https://portal.azure.com
- From the All services blade, search for and select Virtual networks, and then click + Add.
- On the Create virtual network blade, fill in the following (leave the defaults for everything else):
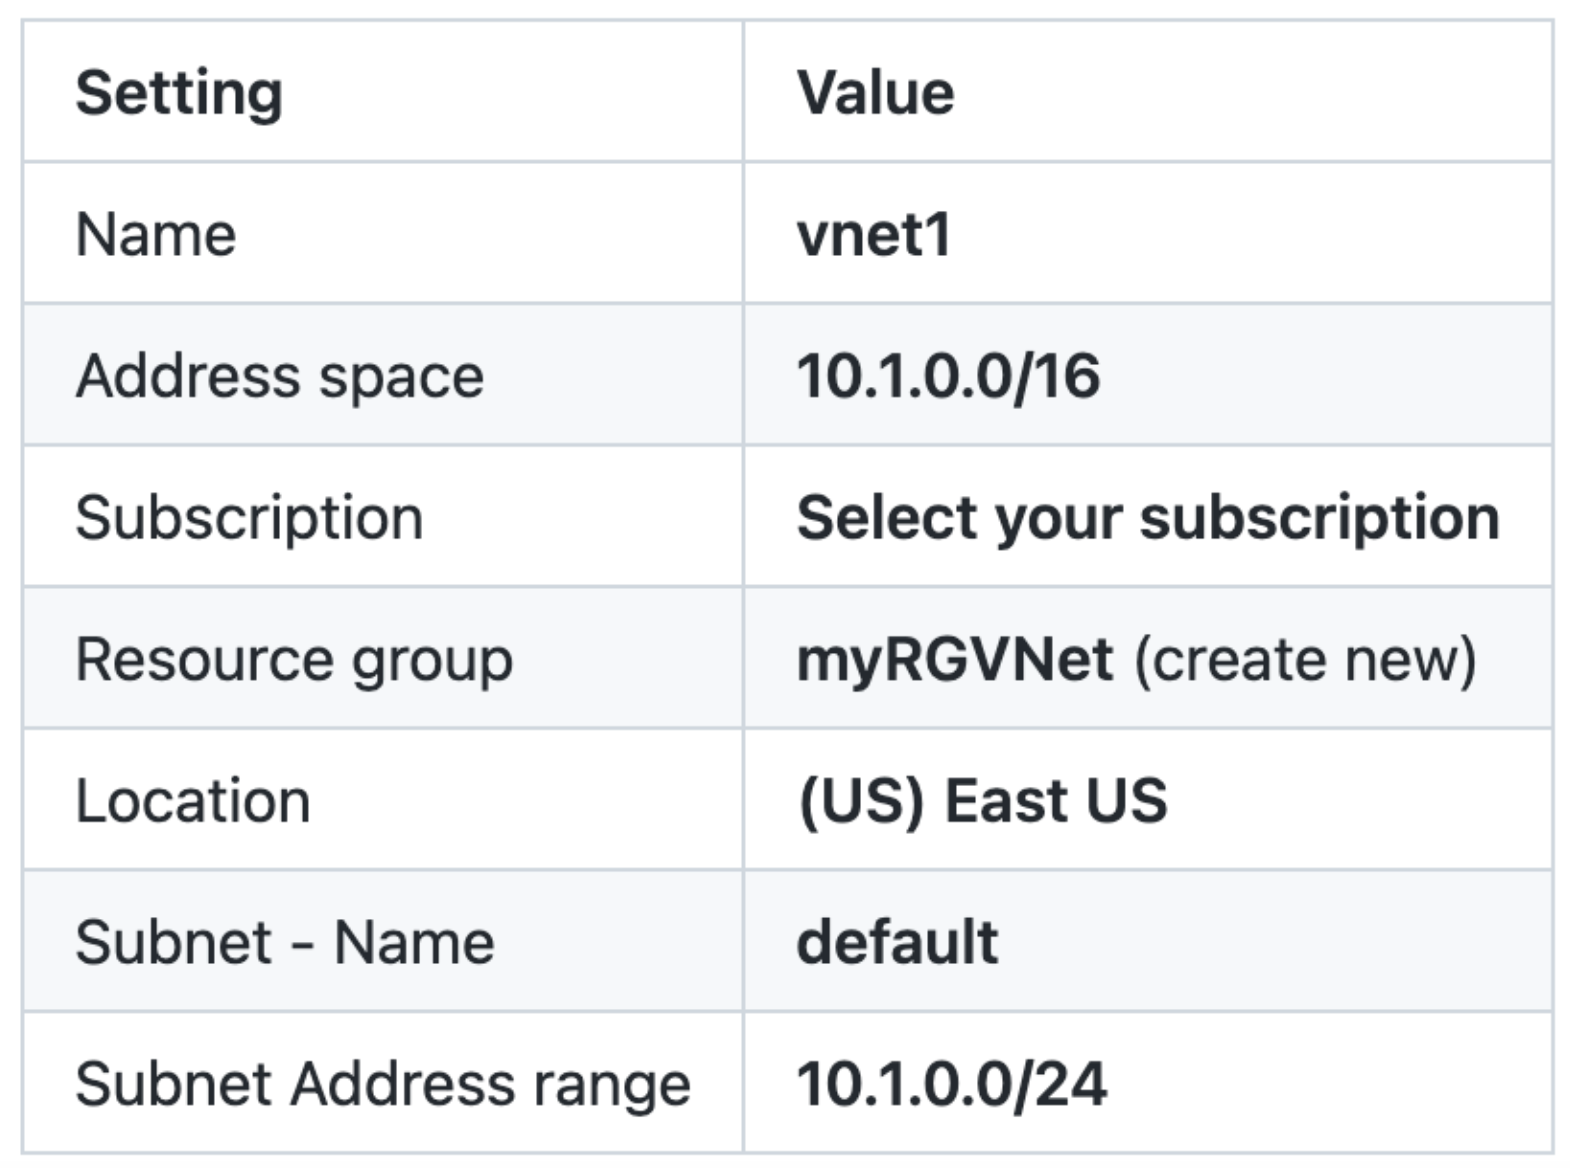
4.

- Click the Review + create button. Ensure the validation passes.
- Click the Create button to deploy the virtual network.
Note: In your organization, how will you know which virtual networks and IP addressing you will need?
Task 2: Create two virtual machines
In this task, we will create two virtual machines in the virtual network.
1. From the All services blade, search for Virtual machines and then click + Add.
2. On the Basics tab, fill in the following information (leave the defaults for everything else):

3. Select the Networking tab. Make sure the virtual machine is placed in the vnet1 virtual network. Review the default settings, but do not make any other changes.

4. Click Review + create. After the Validation passes, click Create. Deployment times can vary but it can generally take between three to six minutes to deploy.
5. Monitor your deployment, but continue on to the next step.
6. Create a second virtual machine by repeating steps 2 to 4 above. Make sure you use a different virtual machine name, that the virtual machine is within the same virtual network, and is using a new public IP address:

Task 3: Test the connection
In this task, we will allow ICMP connections and test whether the virtual machines can communicate (ping) each other.
1. From the All resources blade, search for vm1, open its Overview blade, and make sure its Status is Running. You may need to Refresh the page.
2. On the Overview blade, click the Connect button.
Note: The following directions tell you how to connect to your VM from a Windows computer.
3. On the Connect to virtual machine blade, keep the default options to connect by IP address over port 3389 and click Download RDP File.
4. Open the downloaded RDP file and click Connect when prompted.
5. In the Windows Security window, type the username azureuser and password Pa$$w0rd1234 and then click OK.
6. You may receive a certificate warning during the sign-in process. Click Yes or to create the connection and connect to your deployed VM. You should connect successfully.
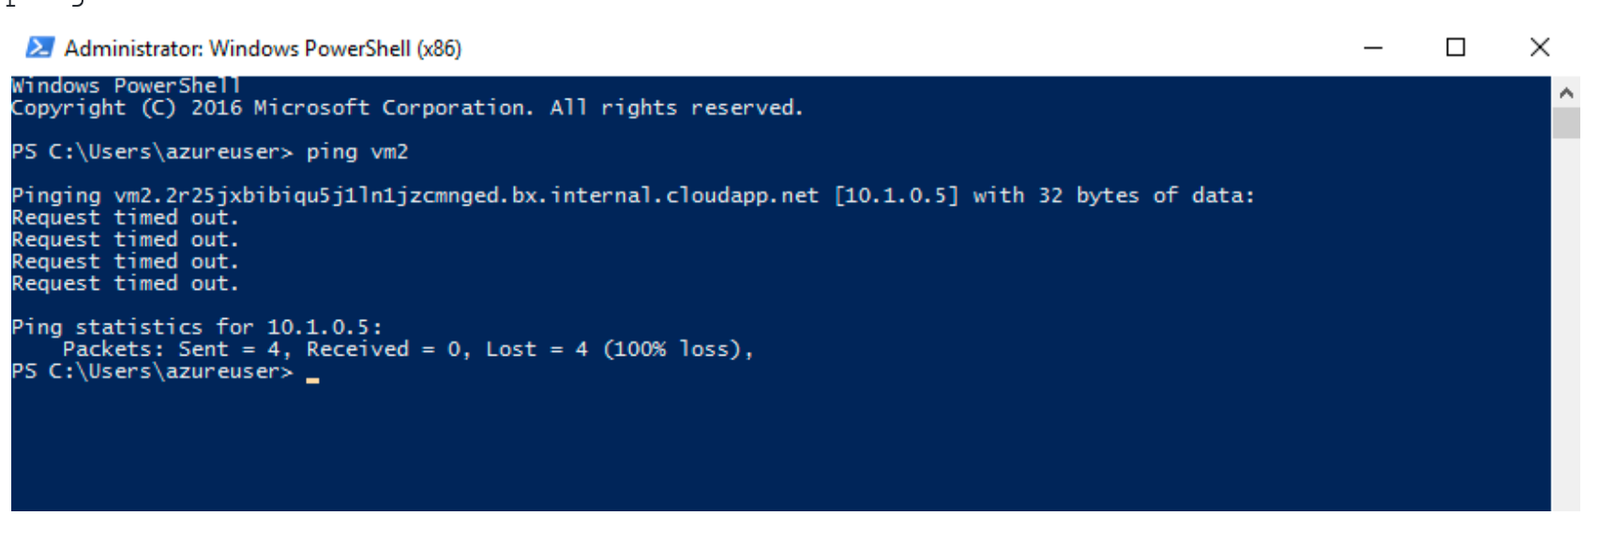
7. Open up a PowerShell command prompt on the virtual machine, by clicking the Start button, typing PowerShell, right clicking Windows PowerShell in the right-click menu, and clicking Run as administrator
8. Try to ping vm2 (make sure vm2 is running). You will receive an error, saying equest timed out. The ping fails, because ping uses the Internet Control Message Protocol (ICMP).
By default, ICMP isn’t allowed through the Windows firewall.
ping vm2
Note: You will now open an RDP session to vm2 and allow incoming ICMP connections
9. Connect to vm2 using RDP. You can follow steps 2 to 6.
10. Open a PowerShell prompt and allow ICMP. This command allows ICMP inbound connections through the Windows firewall :
New-NetFirewallRule –DisplayName “Allow ICMPv4-In” –Protocol ICMPv4

Note: You will now switch to the RDP session to vm1 and try the ping again
11. Return to the RDP session to vm1 and try the ping again. You should now be successful.
ping vm2
Congratulations! You have configured and deployed two virtual machines in a virtual network. You have also configured the Windows firewall so one of the virtual machines allows incoming ping requests.
Note: To avoid additional costs, you can remove this resource group. Search for resource groups, click your resource group, and then click Delete resource group. Verify the name of the resource group and then click Delete. Monitor the Notifications to see how the delete is proceeding.
