

Create a VM with a Template
In this walkthrough, we will deploy a virtual machine with a QuickStart template and examine monitoring capabilities.
Task1: Explore the gallery and locate a template
In this task, we will browse the Azure QuickStart gallery and deploy a template that creates a virtual machine.
- In a browser, access the Azure Quickstart Templates gallery. In the gallery you will find a number of popular and recently updated templates. These templates automate deployment of Azure resources, including installation of popular software packages.
- Browse through the many different types of templates that are available. Note: Are there are any templates that are of interest to you?
- Search for or directly access the Deploy a Virtual Machine template.
Note: The Deploy to Azure button enables you to deploy the template via the Azure portal. During such deployment, you will be prompted only for small set of configuration parameters. - Click the Deploy to Azure button. Your browser session will be automatically redirected to the Azure portal.
- If prompted, sign in to the Azure subscription you want to use in this lab.
- Click Edit template. The Resource Manager template format uses the JSON format. Review the parameters and variables. Then locate the parameter forvirtual machine name. Change the name to myVMTemplate. Save your changes. You are returned to the Custom deployment blade in the Azure portal.

7. On the Custom deployment blade configure the parameters required by the template (replace xxxx in the DNS label prefix with letters and digits such that the label is globally unique). Leave the defaults for everything else.
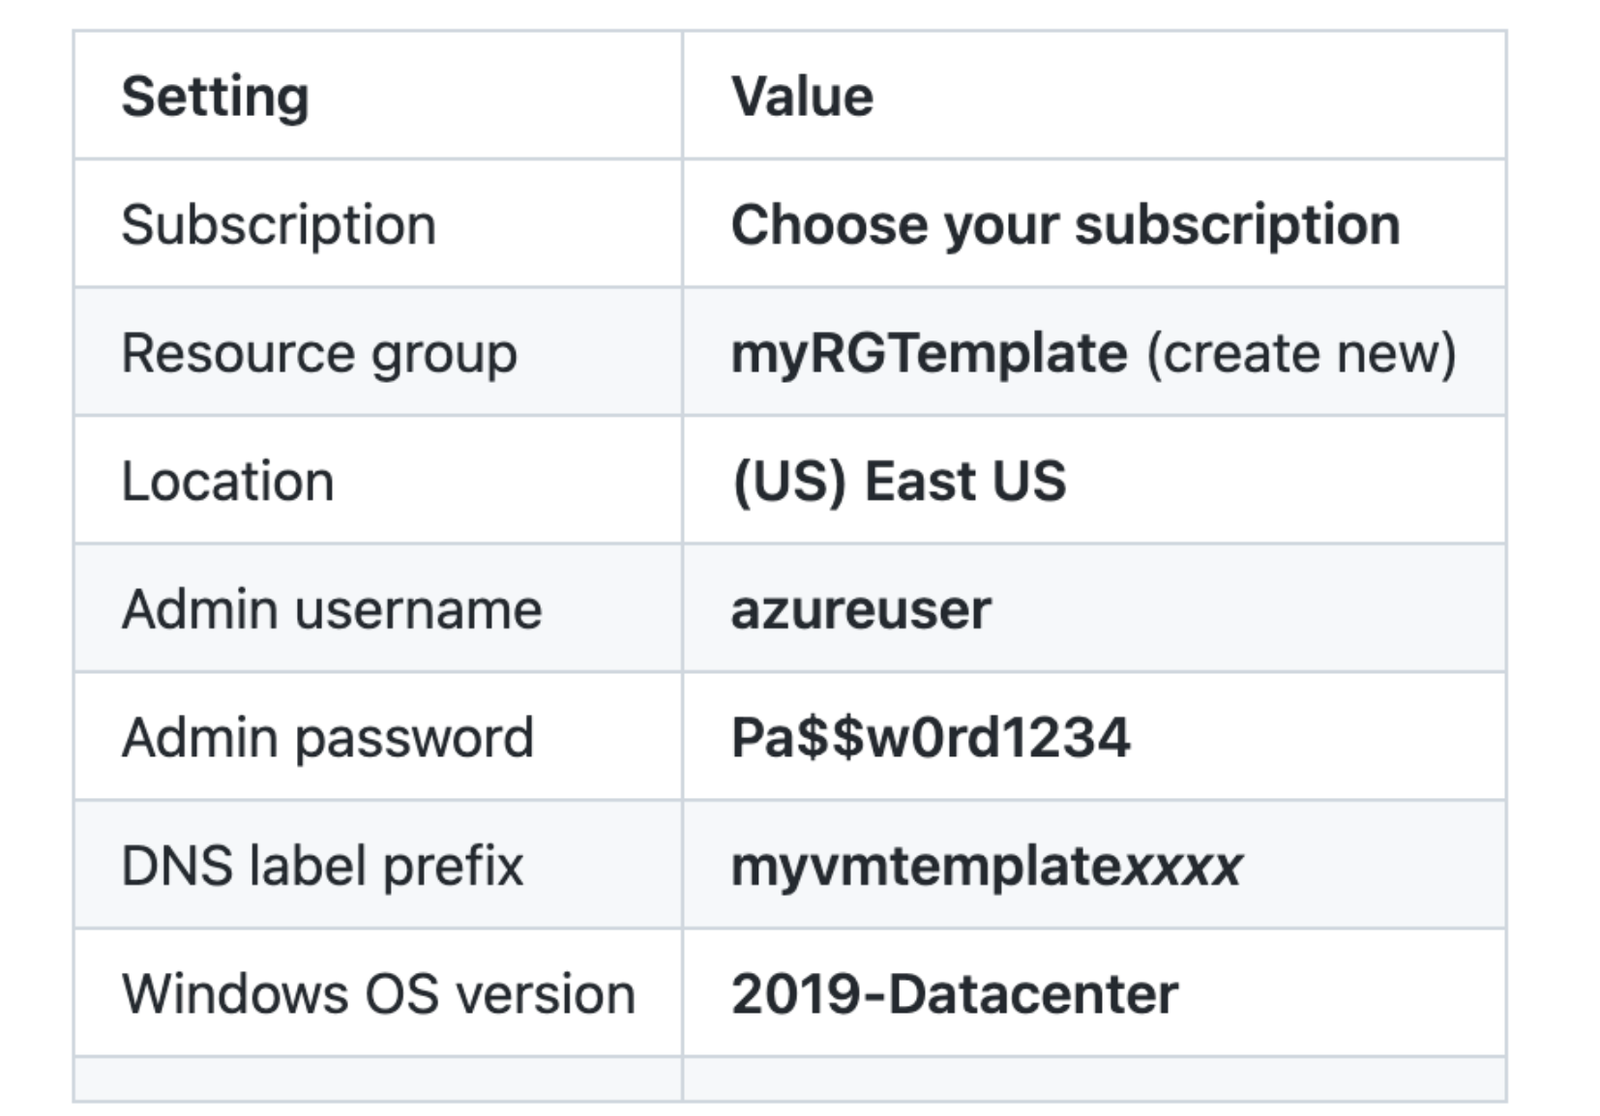
8. Check the box « I agree to the terms and conditions stated above and then click Purchase.
** Note: There is no cost associated with this template.
9. Click Review + Create.
10.Monitor your deployment.
Task 2: Verify and monitor your virtual machine deployment
In this task, we will verify the virtual machine deployed correctly.
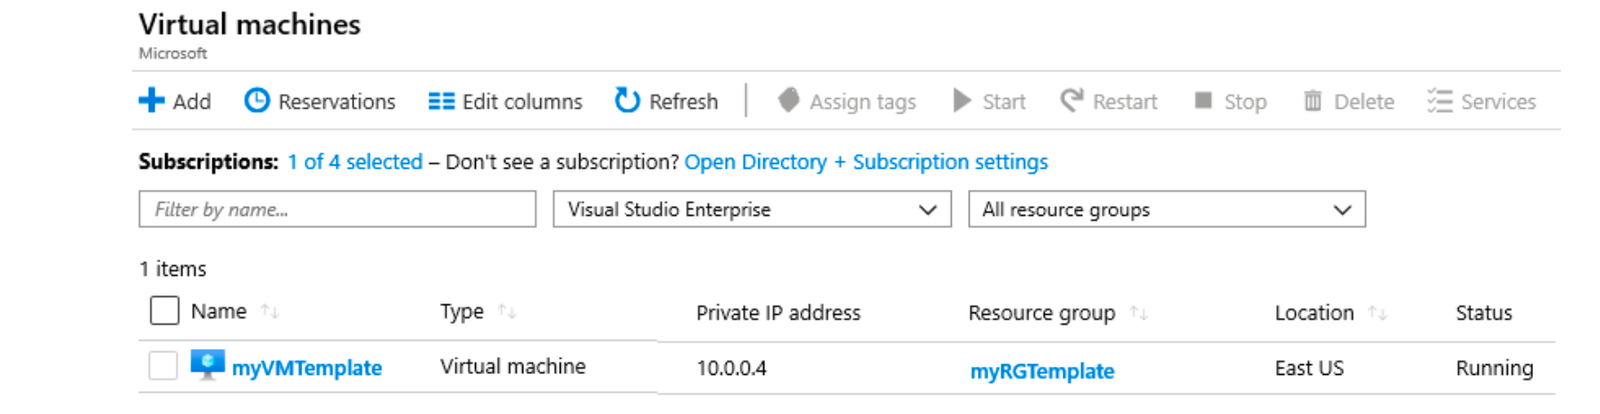
1. From the All services blade, search for and select Virtual machines.
2. Ensure your new virtual machine was created.
- Select your virtual machine and on the Overview pane scroll down to view monitoring data.
Note: The monitoring timeframe can be adjusted from one hour to 30 days. - Review different charts that are provided including CPU (average), Network (total), and Disk bytes (total).

- Click on any chart. Note that you can Add metric and change the chart type. If you have time, experiment.
- Return to the Overview blade.
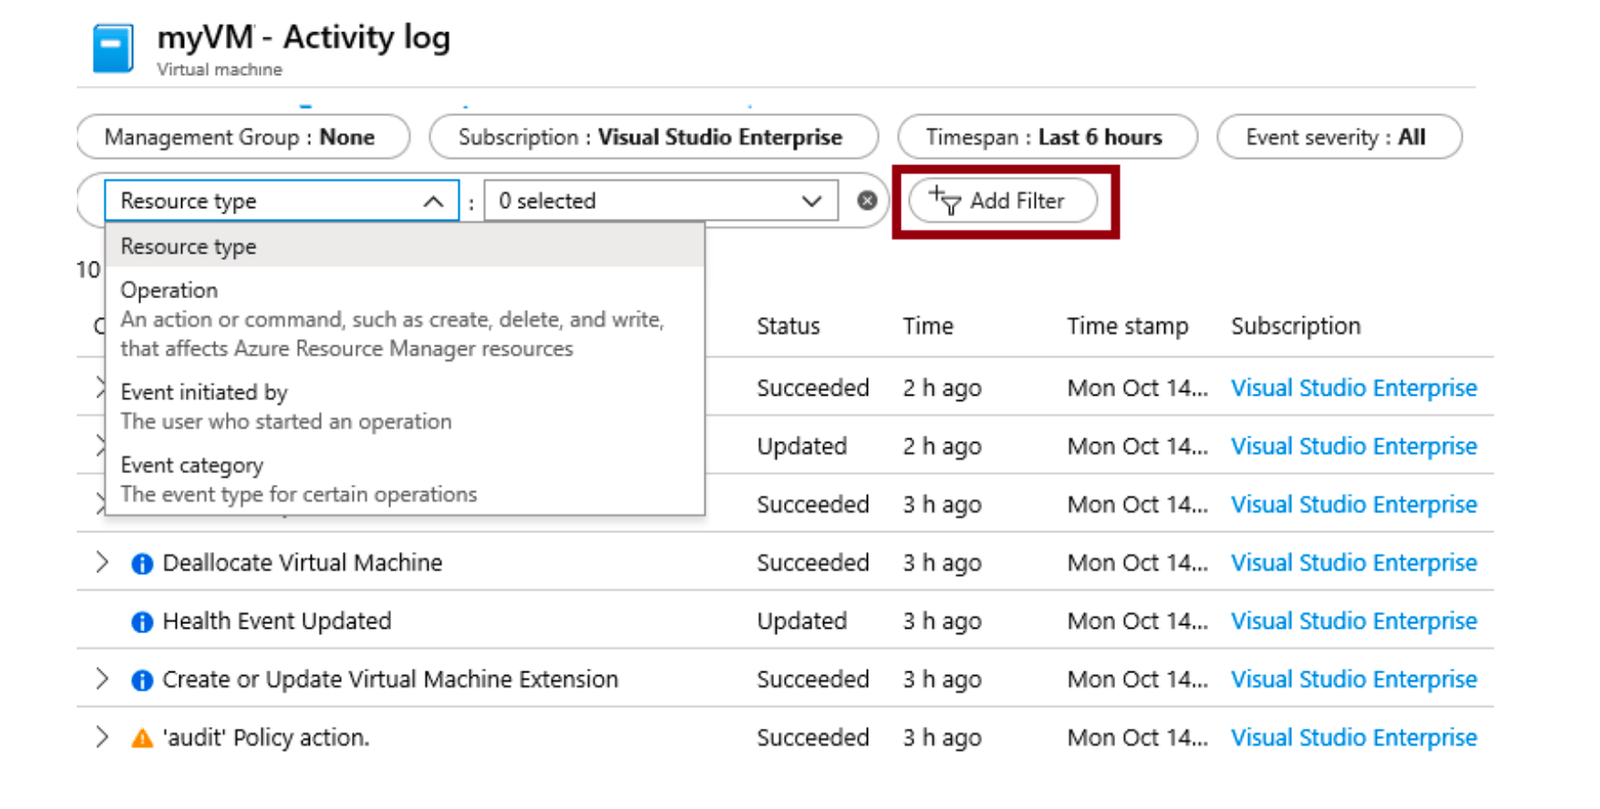
- Click on the Activity log (left pane). Activity logs record such events as creation or modification of resources.
8. Click Add filter, and experiment with searching for different event types and operations.
Note: To avoid additional costs, you can remove this resource group. Search for resource groups, click your resource group, and then click Delete resource group. Verify the name of the resource group and then click Delete. Monitor the Notifications to see how the delete is proceeding.
