Create a VM with PowerShell
In this walk-through, we will configure the Cloud Shell, use Azure PowerShell module to create a resource group and virtual machine, and review Azure Advisor recommendations.
Task 1: Configure the Cloud Shell
In this task, we will configure Cloud Shell.
- Sign in to the Azure portal.
- From the Azure portal, open the Azure Cloud Shell by clicking on the icon in the top right of the Azure Portal.

- If you have previously used the Cloud Shell, proceed to the next task.
- When prompted to select either Bash or PowerShell, select PowerShell.
- When prompted, click Create storage, and wait for the Azure Cloud Shell to initialize.
Task 2: Create a resource group and virtual machine
In this task, we will use PowerShell to create a resource group and a virtual machine.
- Ensure PowerShell is selected in the upper-left drop-down menu of the Cloud Shell pane.
- In the PowerShell session, within the Cloud Shell pane, create a new resource group.
New-AzResourceGroup -Name myRGPS -Location EastUS - Verify your new resource group.
Get-AzResourceGroup | Format-Table Create a virtual machine. When prompted provide the username (azureuser) and the password (Pa$$w0rd1234) that will be configured as the local Administrator account on that virtual machines. Ensure that you include the tick (`) characters at the end of each line except for the last one (there should not be any tick characters if you type entire command on a single line).
New-AzVm `-ResourceGroupName « myRGPS » `
-Name « myVMPS » `
-Location « East US » `
-VirtualNetworkName « myVnetPS » `
-SubnetName « mySubnetPS » `
-SecurityGroupName « myNSGPS » `
-PublicIpAddressName « myPublicIpPS »** Wait for VM to deploy before closing PowerShell
- Close the PowerShell session Cloud Shell pane.
- In the Azure portal, search for Virtual machines and verify the myVMPS is running. This may take a few minutes.

7. Access the new virtual machine and review the Overview and Networking settings to verify your information was correctly deployed.
Task 3: Execute commands in the Cloud Shell
In this task, we will practice executing PowerShell commands from the Cloud Shell.
- From the Azure portal, open the Azure Cloud Shell by clicking on the icon in the top right of the Azure Portal.
- Ensure PowerShell is selected in the upper-left drop-down menu of the Cloud Shell pane.
- Retrieve information about your virtual machine including name, resource group, location, and status. Notice the PowerState is running.
Get-AzVM -name myVMPS -status | Format-Table -autosize
- Stop the virtual machine. When prompted confirm (Yes) to the action.
Stop-AzVM -ResourceGroupName myRGPS -Name myVMPS - Verify your virtual machine state. The PowerState should now be deallocated. You can also verify the virtual machine status in the portal.
Get-AzVM -name myVMPS -status | Format-Table -autosize
Task 4: Review Azure Advisor Recommendations
Note: This same task is in the Create a VM with Azure CLI lab.
- From the All services blade, search for and select Advisor.
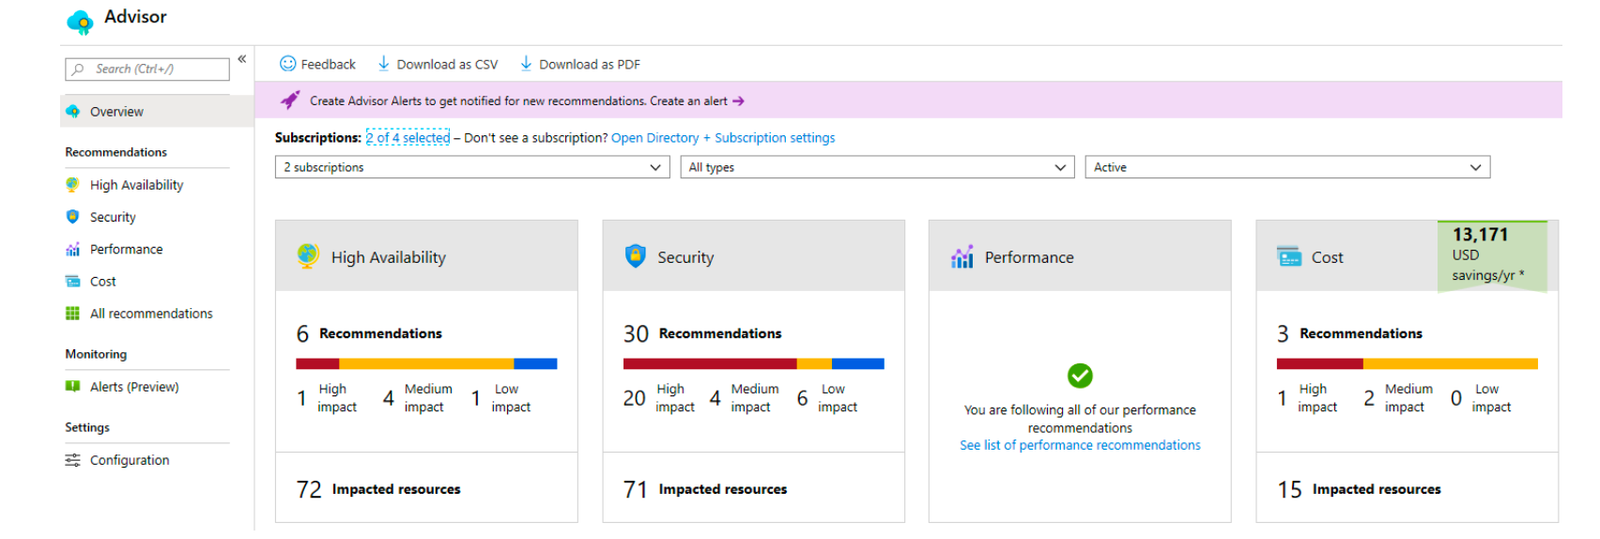
- On the Advisor blade, select Overview. Notice recommendations are grouped by High Availability, Security, Performance, and Cost.

3. Select All recommendations and take time to view each recommendation and suggested actions.
Note: Depending on your resources, your recommendations will be different.

- Notice that you can download the recommendations as a CSV or PDF file.
- Notice that you can create alerts.
- If you have time, continue to experiment with Azure PowerShell.
Congratulations! You have configured Cloud Shell, created a virtual machine using PowerShell, practiced with PowerShell commands, and viewed Advisor recommendations.
Note: To avoid additional costs, you can remove this resource group. Search for resource groups, click your resource group, and then click Delete resource group. Verify the name of the resource group and then click Delete. Monitor the Notifications to see how the delete is proceeding.

