

Create blob storage
In this walkthrough, we will create a storage account, then work with blob storage files.
Task 1: Create a storage account
In this task, we will create a new storage account.
- Sign in to the Azure portal at https://portal.azure.com
- From the All services blade, search for and select Storage accounts, and then click + Add.
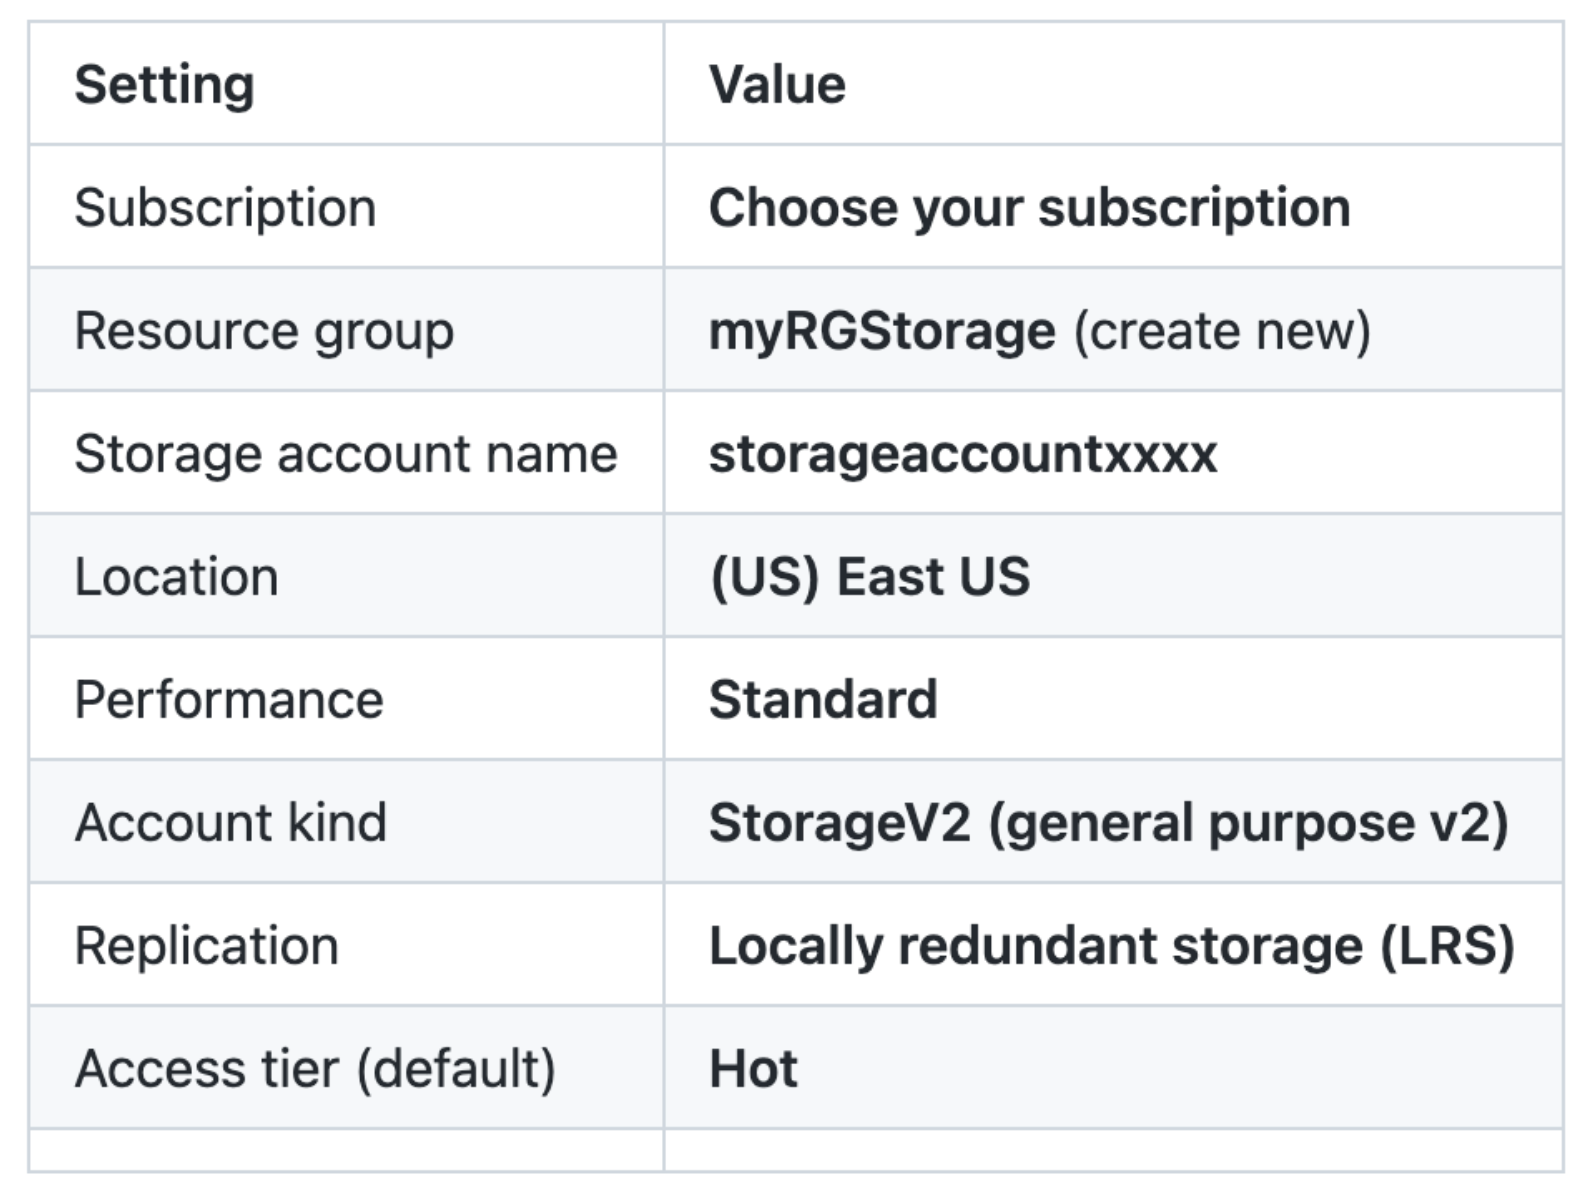
- On the Basics tab of the Create storage account blade, fill in the following information (replace xxxx in the name of the storage account with letters and digits such that the name is globally unique). Leave the defaults for everything else.
4. Click Review + Create to review your storage account settings and allow Azure to validate the configuration.
5. Once validated, click Create. Wait for the notification that the account was successfully created.
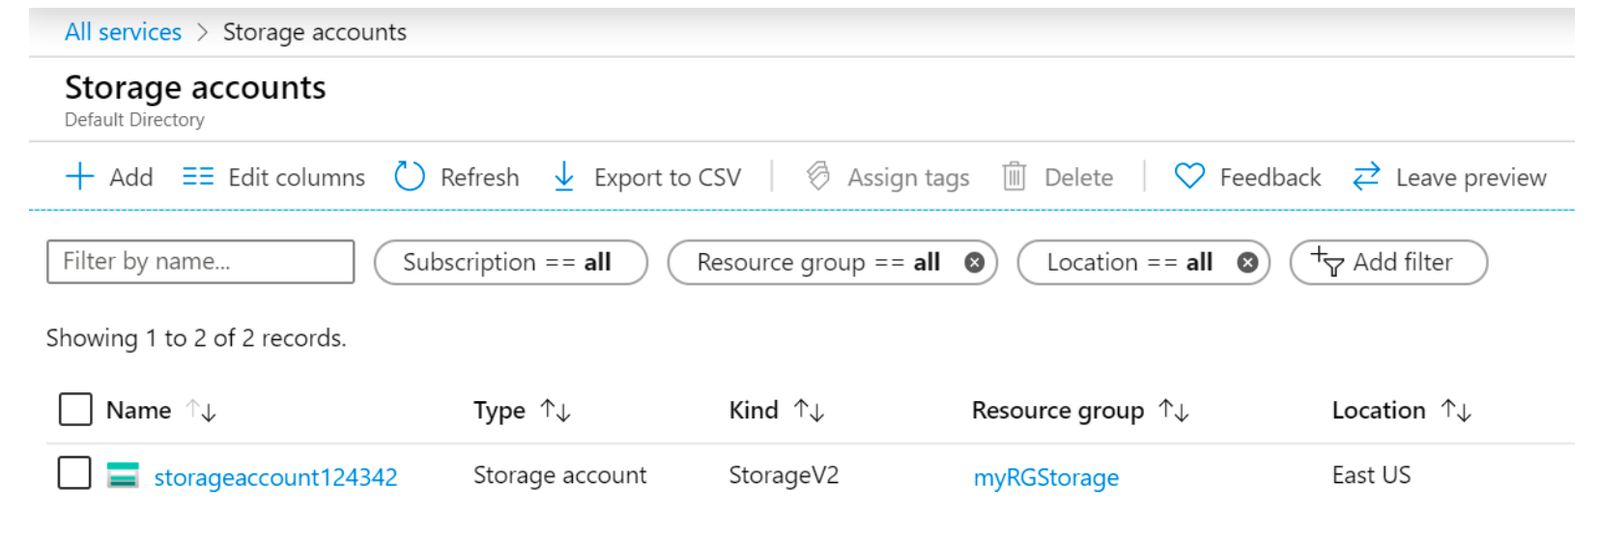
6. From the Home page, search for and select Storage accounts and ensure your new storage account is listed.
Task 2: Work with blob storage
In this task, we will create a Blob container and upload a blob file.
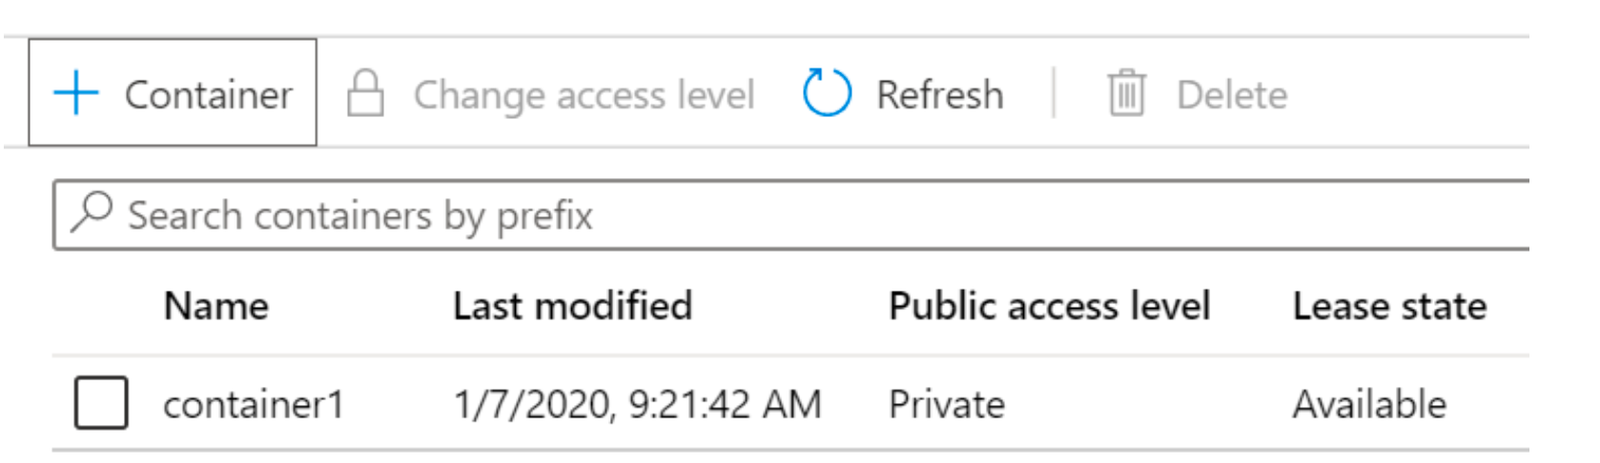
1. Click the name of the new storage account, scroll to the Blob service section, and then click Containers.
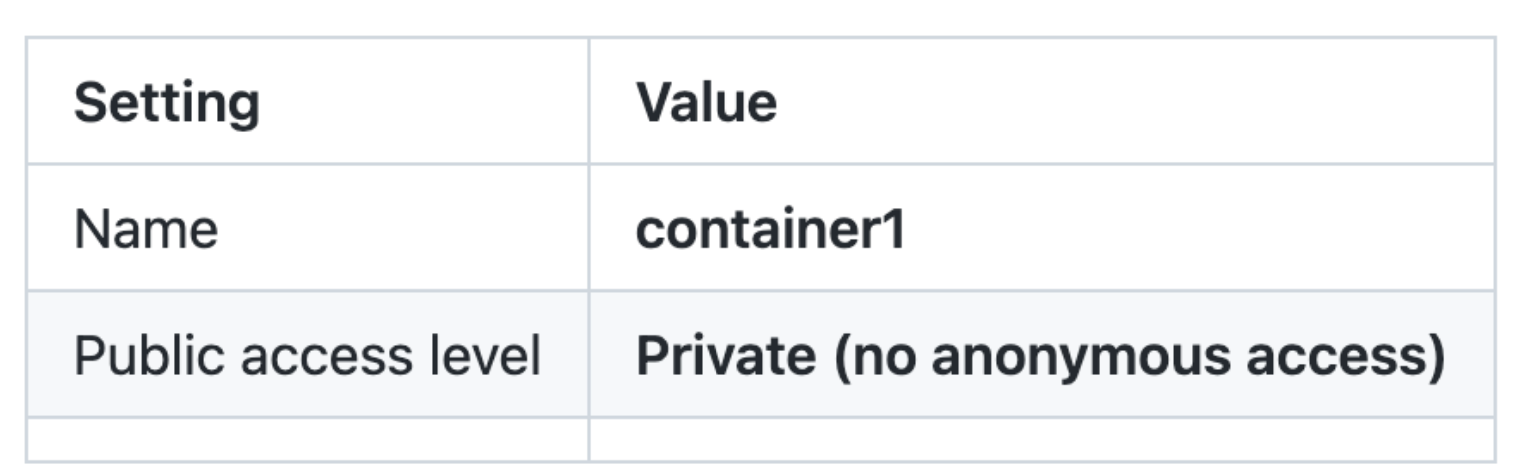
2. Click + Container and complete the information. Use the Information icons to learn more. When done click OK.
- Click the container1 container, and then click Upload.
- Browse to a file on your local computer.
Note: You can create an empty .txt file or use any existing file. Consider chooosing a file of a small size to minimize the upload time.
- Click the Advanced arrow, leave the default values but review the available options, and then click Upload.
Note: You can upload as many blobs as you like in this way. New blobs will be listed within the container.
- Once the file is uploaded, right-click on the file and notice the options including View/edit, Download, Properties, and Delete.
- As you have time, from the storage account blade, review the options for Files, Tables, and Queues.
Task 3: Monitor the storage account
- If needed, return to the storage account blade and click Diagnose and solve problems.
- Explore some of the most common storage problems. Notice there are multiple troubleshooter.
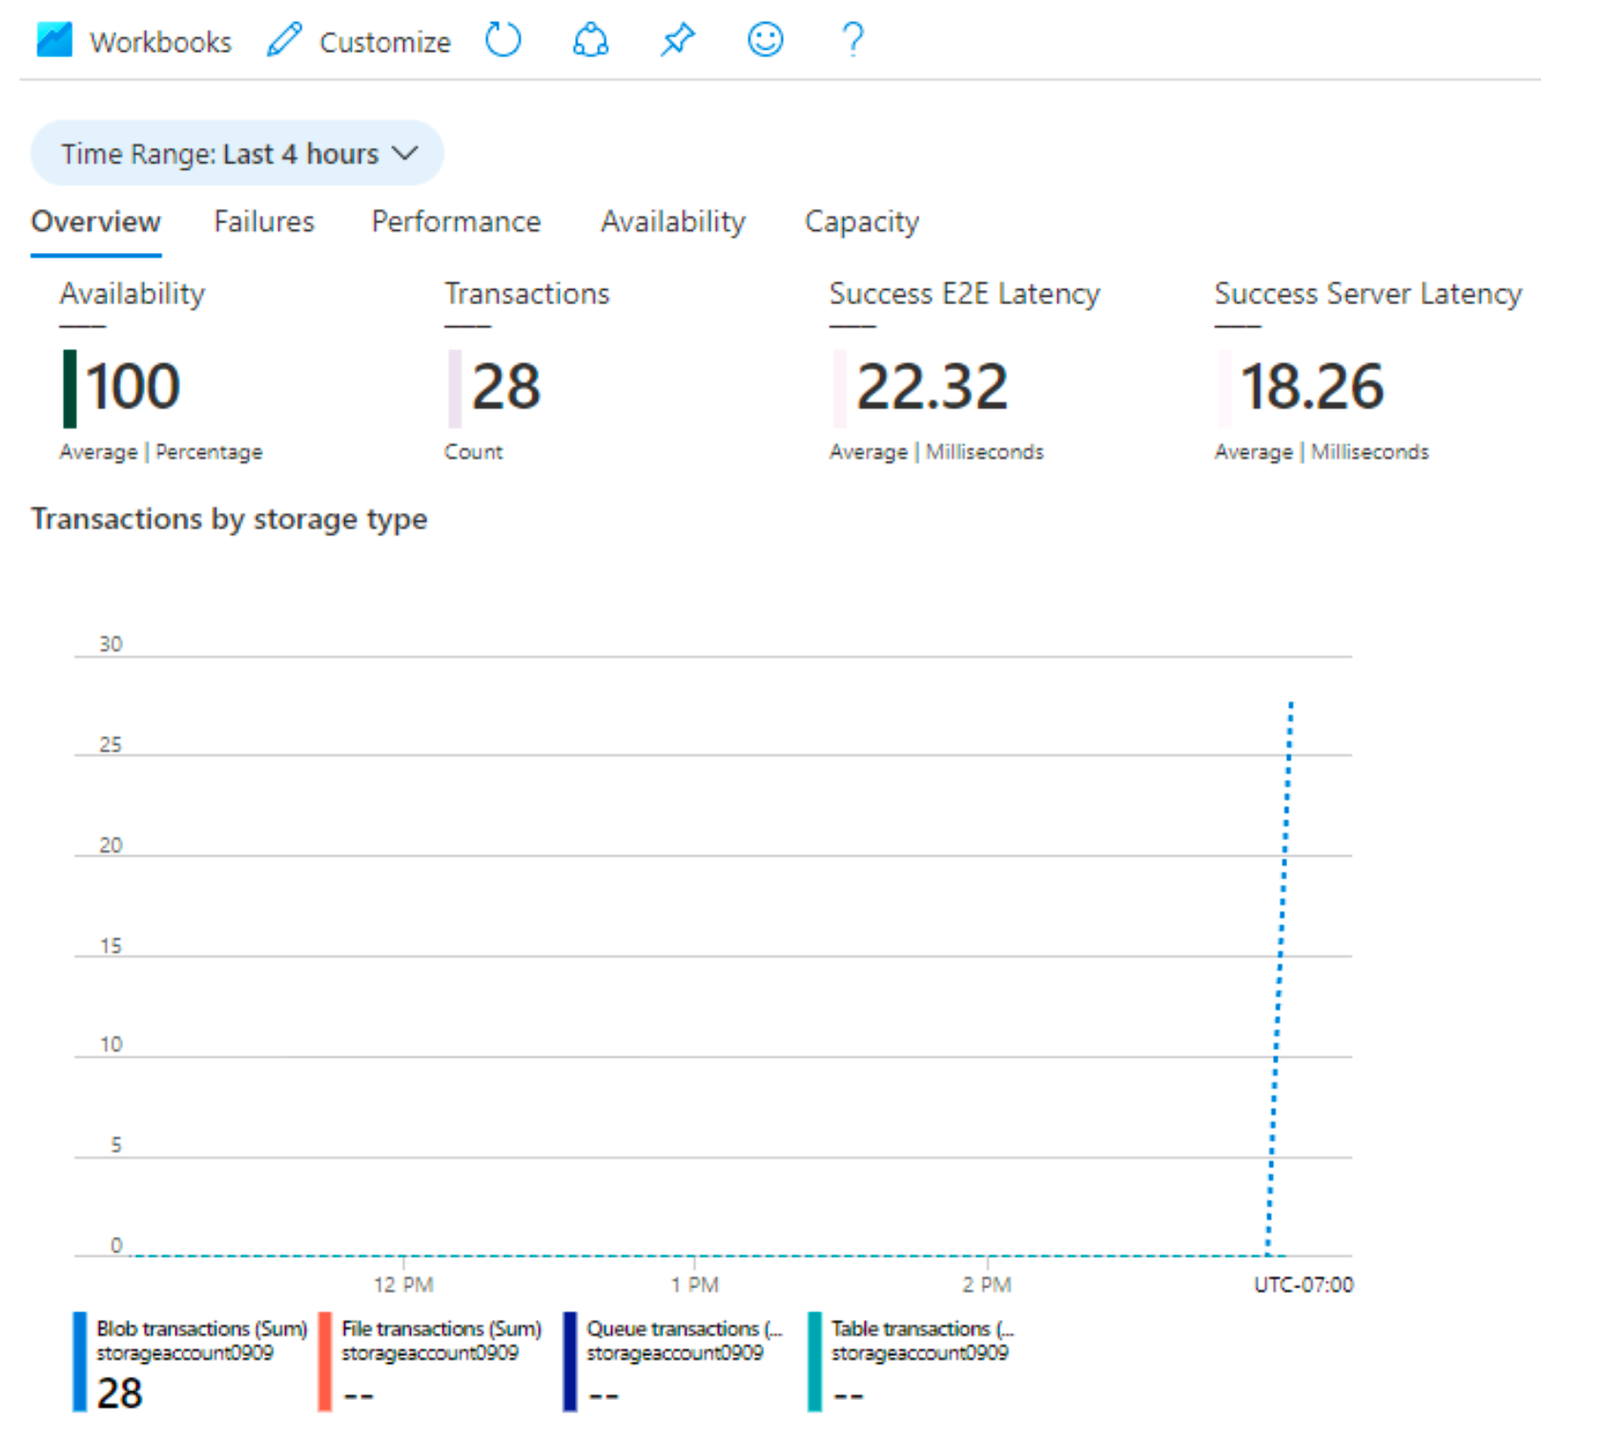
- On the storage account blade, scroll down to the Monitoring section and click Insights. Notice there is information on Failures, Performance, Availability, and Capacity. Your information will be different.
Congratulations! You have created a storage account, then worked with storage blobs.
Note: To avoid additional costs, you can remove this resource group. Search for resource groups, click your resource group, and then click Delete resource group. Verify the name of the resource group and then click Delete. Monitor the Notifications to see how the delete is proceeding.
